What Is a Wire Feed Welder? Tips to Know
On this page (9 sections)
- Understanding the Wire Feed Welder: Your Guide
- How Does a Wire Feed Welder Actually Work?
- Key Components of Your Wire Feed Welder
- Choosing the Right Wire and Gas
- Tips for Better Wire Feed Welding
- Common Wire Feed Welder Issues and Solutions
- Quick Checklist for Your Next Weld
- Conclusion
- Frequently Asked Questions
A wire feed welder, often called a MIG welder, is a type of welding machine that uses a continuously feeding wire electrode to create a strong weld. It’s a popular choice for many DIYers and professionals because it’s known for being easier to learn than other welding methods and can handle a variety of metals. You get a clean, consistent bead with less effort.
This kind of welder works by feeding a solid wire electrode through a welding gun. An electric arc forms between the wire and the metal you’re joining, melting both to create a weld. The wire is fed at a controlled speed, which helps maintain a steady arc and produce high-quality welds. Many find this makes it more forgiving for beginners.
- Wire feed welders use a continuous wire.
- They are often called MIG welders.
- They are generally easier to learn.
- They provide consistent weld beads.
- They work on various metals.
Ready to learn more about how these machines work and what to look for? Let’s get into the details of wire feed welding.
Understanding the Wire Feed Welder: Your Guide
So, you’re curious about wire feed welders, huh? These machines are fantastic tools for anyone looking to join metal pieces together. They’re a favorite for many because they simplify the welding process. You get a strong, clean weld without too much fuss. Let’s break down what makes them tick and how you can get the most out of yours.
How Does a Wire Feed Welder Actually Work?
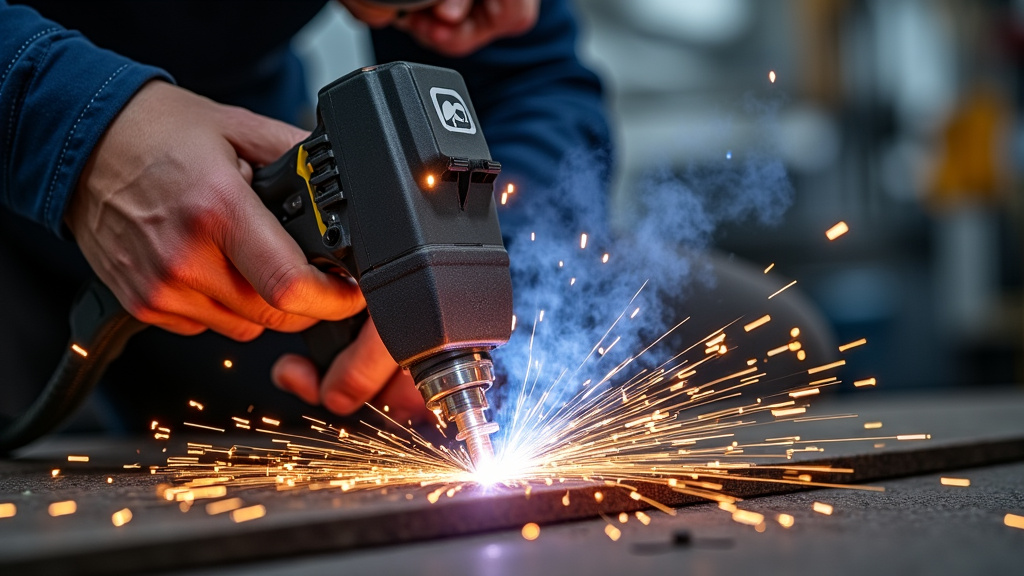
At its core, a wire feed welder is all about automating the electrode feed. Instead of manually changing a welding rod, a spool of wire feeds through the welding gun. This wire is the electrode. As you pull the trigger on the gun, the wire starts moving. Simultaneously, electricity flows through it.
The Arc and the Melt
This electrical current creates an arc. The arc jumps from the tip of the wire to the metal you’re working on. This arc is incredibly hot, easily reaching thousands of degrees Fahrenheit. It’s this intense heat that melts both the wire and the base metal. As the molten metal cools, it fuses together, creating your weld.
Shielding the Weld
A crucial part of the process is shielding. As the metal melts, it’s highly susceptible to contamination from the air. Things like oxygen and nitrogen can weaken the weld. Wire feed welders use a shielding gas to protect the molten puddle. This gas, usually a mix of argon and CO2, flows from the welding gun along with the wire. It pushes the air away, ensuring a Learn more about how shielding gas protects the weld puddle in our guide to gas welding.clean and strong weld. Some machines can also use a “flux-cored” wire, which contains its own shielding agents, eliminating the need for external gas.
Key Components of Your Wire Feed Welder
Understanding the different parts will help you operate your welder more effectively. Think of it like knowing your car’s dashboard.
The Power Source
This is the main unit. It supplies the electrical power needed to create the arc. You’ll find controls here for voltage and wire speed. Adjusting these settings is how you tailor the weld to your specific metal thickness and type. A good power source provides a stable and consistent output.
The Wire Feeder
Inside the machine, rollers push the welding wire from the spool. The speed of these rollers is directly controlled by the wire speed setting on your welder. You want the wire to feed smoothly and consistently. Any hiccups here can lead to an uneven weld bead.
The Welding Gun (or Torch)
This is the part you hold. It houses the trigger, the wire contact tip, and the gas nozzle. When you pull the trigger, it activates the wire feed, the electrical current, and the flow of shielding gas. The contact tip is important; it transfers the electrical current to the wire. It needs to be the correct size for your wire diameter.
The Spool of Wire
This is your consumable. The wire comes on a spool and is fed into the machine. Different types of wire are available for various metals and applications. The diameter of the wire is also important; it needs to match the contact tip in your gun.
The Shielding Gas System (if applicable)
If you’re using a gas-shielded welder (often called MIG welders), you’ll have a cylinder of shielding gas. A regulator on the cylinder controls the gas flow rate. Too little gas leaves your weld vulnerable. Too much gas can cause turbulence and contamination.
Choosing the Right Wire and Gas
Selecting the correct wire and shielding gas is vital for achieving strong welds. It’s not a one-size-fits-all situation.
Wire Types
You’ll find solid wire and flux-cored wire. Solid wire requires shielding gas. It’s great for clean work on materials like steel, stainless steel, and aluminum. Flux-cored wire has a flux coating that produces its own shielding gas and slag. This type is often used outdoors or in drafty conditions because it’s less affected by wind. Many experts recommend starting with solid wire for indoor projects as it typically produces a cleaner finish (Lincoln Electric).
Common Wire Materials and Uses
- Steel Wire: The most common type, used for welding mild steel.
- Stainless Steel Wire: For welding stainless steel, maintaining its corrosion resistance.
- Aluminum Wire: Specifically designed for welding aluminum. It can be a bit trickier to feed.
- Flux-Cored Wire: Good for general-purpose steel welding, especially when gas shielding isn’t practical.
Shielding Gas Options
The shielding gas protects the weld puddle. It also influences the arc characteristics and the penetration of your weld.
Popular Gas Mixtures
- Pure Argon: Primarily used for aluminum and other non-ferrous metals. It provides a very stable arc.
- 80% Argon / 20% CO2: A very common mix for welding mild steel. It offers good penetration and a relatively smooth bead.
- 75% Argon / 25% CO2: Similar to the 80/20 mix, it’s excellent for steel and provides a slightly broader arc.
- Pure CO2: Offers deep penetration, especially on thicker steel. However, it can create a more spattery arc and a rougher bead.
Always check the wire manufacturer’s recommendations for the best gas to use with their specific wire. This ensures optimal weld quality.
Tips for Better Wire Feed Welding
Even with an easy-to-use welder, a few tips can make a big difference in your results.
Preparation is Key
Before you even think about striking an arc, clean your metal. Rust, paint, oil, and dirt are enemies of a good weld. Use a wire brush or grinder to get the metal down to shiny steel. This prevents contaminants from getting into your weld puddle.
Mastering Your Settings
Finding the sweet spot for voltage and wire speed is critical. Manufacturers often provide charts in their manuals or on the machine itself. These charts give a starting point based on metal thickness and wire type. You’ll want to practice on scrap pieces to fine-tune the settings. Listen to the sound of the arc – it should sound like bacon frying, not like a machine gun or a muffled roar.
Proper Gun Angle and Stick-out
Hold the welding gun at a slight angle, typically about 15 degrees, pushing the gun forward (a “push” technique). This helps keep the shielding gas flowing correctly. The distance between the contact tip and the metal surface is called “stick-out.” Keeping a consistent stick-out, usually around 1/4 to 1/2 inch, is important for a stable arc and good weld bead. Too short can cause the wire to stick. Too long can lead to poor shielding and a weak weld.
Movement and Consistency
Try to move the gun smoothly and at a consistent speed. If you move too fast, your weld won’t penetrate properly. Move too slowly, and you can burn through the metal or create a messy bead. For many, a slight weaving motion helps create a nice, uniform bead. Practice makes perfect here!
Common Wire Feed Welder Issues and Solutions
Even the best welders can encounter problems. Knowing what to look for helps you fix them quickly.
Spitting and Spatter
This is often caused by incorrect settings. Try adjusting your voltage and wire speed. You might also have dirty metal or an issue with your shielding gas flow. Make sure your contact tip isn’t worn out.
Wire Feeding Problems
If the wire isn’t feeding smoothly, check the rollers on your wire feeder. Are they clean and the correct size for your wire? Also, inspect the liner inside your welding gun for kinks or obstructions. A bent liner is a common culprit.
Weak or Inconsistent Welds
This usually points to poor shielding or insufficient heat. Double-check your gas flow, gun angle, and stick-out. Ensure your metal is clean and that your welder settings are appropriate for the material thickness.
Quick Checklist for Your Next Weld
Before you start welding, run through this quick mental checklist:
- Is the metal clean and free of rust or paint?
- Are the wire feed rollers set correctly for your wire size?
- Is the contact tip clean and the right size for your wire?
- Is your shielding gas flow rate set correctly (if applicable)?
- Are your voltage and wire speed settings appropriate for the material?
- Do you have a consistent stick-out on your welding gun?
Taking these steps will help ensure you get a solid weld every time. It’s all about attention to detail and practice!
Conclusion
You’ve now got a solid understanding of what a wire feed welder is and how it can help you create strong metal joints. We’ve covered how these machines work, their essential parts, and the importance of choosing the right wire and gas. Remember, preparation is your best friend. Always clean your metal thoroughly before welding. Practicing your settings and gun technique on scrap pieces will make a huge difference. Keep these tips in mind, and you’ll be well on your way to producing consistent, quality welds. Your next step? Gather your supplies and start practicing on some scrap metal to get a feel for your machine.
Frequently Asked Questions
What’s the main difference between a MIG welder and a wire feed welder?
There isn’t a main difference; they are essentially the same thing. MIG (Metal Inert Gas) welding is the most common type of wire feed welding, using a continuous wire electrode and a shielding gas to protect the weld.
Can I use a wire feed welder outdoors or in windy conditions?
It’s challenging. Wind can blow away the shielding gas needed for a clean weld when using solid wire. Flux-cored wire is a better option outdoors because it creates its own shielding, making it less sensitive to drafts.
How do I know if my wire feed welder settings are correct?
Listen to the sound of the arc – it should sound like sizzling bacon. If it sounds like a rapid popping or a loud roar, your settings are likely off. Refer to your welder’s manual for recommended starting points for different metal thicknesses.
What is “stick-out” and why is it important for wire feed welding?
Stick-out is the length of wire extending from the tip of your welding gun’s nozzle. Maintaining a consistent stick-out, usually around 1/4 to 1/2 inch, helps ensure proper shielding and a stable arc for a good weld.
What is the best way to clean metal before welding with a wire feed welder?
Thorough cleaning is vital. Use a wire brush or grinder to remove any rust, paint, oil, or dirt from the metal surfaces you plan to join. This prevents contaminants from weakening your weld.