What Is a MIG Welder? Signs to Watch For
On this page (8 sections)
A MIG welder is a type of welding machine that uses a continuously feeding wire electrode. This wire melts to create a strong weld. It’s also known as gas metal arc welding (GMAW). MIG welding is popular for its ease of use and versatility. If you are comparing it with stick welding, see our guide to stick and MIG welding. You can use it on various metal thicknesses.
Understanding how a MIG welder works can help you achieve better results. It involves feeding filler wire through a welding gun. A shielding gas protects the molten weld pool from contamination. This process is vital for creating clean and strong welds. Many DIYers and professionals prefer MIG welding for its accessibility.
- A MIG welder uses a wire electrode to create welds.
- It’s also called Gas Metal Arc Welding (GMAW).
- A shielding gas protects the weld from air.
- This method is good for beginners and various projects.
- It’s known for being relatively easy to learn.
We’ve put together this guide to help you understand MIG welders. Below, we’ll cover what they are and what to look for. Let’s get you welding like a pro in no time!
Understanding Your MIG Welder: The Basics and What to Look For
So, you’re curious about MIG welders and what makes them tick? That’s a great starting point! A MIG welder is essentially a tool that uses a wire electrode to join pieces of metal. This wire feeds continuously through a welding gun. As it touches your workpiece, it melts, creating a strong bond. It’s like a super-powered hot glue gun for metal, but way more durable.
You might also hear it called Gas Metal Arc Welding, or GMAW. Don’t let the fancy acronym scare you. The core idea is simple: melt some metal to join other metal. This process is favored by many for its relative ease of use, especially compared to older welding methods. If you’re new to welding, MIG is often a recommended place to start your journey.
How a MIG Welder Actually Works
Let’s break down the magic behind MIG welding. At its heart, a MIG welder is an electrical tool. It uses electricity to generate heat. This heat is intense enough to melt the metal you’re working on and the wire you’re feeding into the joint. It’s a careful balance of power and control.
The Role of the Wire Electrode
Think of the wire electrode as the filler material and the electrical conductor. It’s spooled inside the welder. When you pull the trigger on the welding gun, two things happen at once. The wire starts feeding out, and an electric current flows through it. This creates an arc. The arc is what melts the wire and the base metal.
The wire comes in different diameters and materials. Choosing the right wire depends on the type of metal you’re welding and its thickness. For example, you wouldn’t use the same wire for thin sheet metal as you would for thick steel beams. Getting this right is key to a strong weld.
The Importance of Shielding Gas
This is where the “Gas” in GMAW comes in. Without a shielding gas, your molten weld pool would be exposed to the air. Air contains oxygen and nitrogen. These elements can contaminate the weld. This contamination weakens the joint, making it brittle and prone to cracking. You don’t want that!
So, the welder releases a stream of shielding gas from the welding gun. This gas surrounds the arc and the molten metal. It acts like a protective barrier, pushing away the air. Common shielding gases include pure argon or a mix of argon and carbon dioxide. The type of gas you use also depends on the metal you’re welding. For instance, pure argon is often used for aluminum. A mix is common for steel. Proper gas flow is essential for a clean weld.
The Welding Gun and Trigger Control
The welding gun is your hand’s extension into the welding process. It houses the mechanism to feed the wire and directs the flow of shielding gas. When you squeeze the trigger, you activate the wire feeder, the gas flow, and the electrical circuit to create the welding arc.
This trigger control is what makes MIG welding feel so intuitive. You’re managing the feed rate of the wire and the arc length simultaneously. It requires some practice, but most people find it easier to get the hang of than other welding types. It’s about finding that sweet spot where everything works together.
Signs of a Good MIG Welder Setup
When you’re looking at MIG welders, or even just your current setup, there are a few indicators that tell you things are working as they should. Think of these as your welding health check. They help ensure you’re getting the best possible results from your machine.
Stable Wire Feed
A good MIG welder will have a consistent and smooth wire feed. If the wire sputters, jams, or feeds erratically, you’re going to have problems. This could be due to a worn-out drive roller, a kink in the wire, or a dirty liner in your welding gun. A stable feed means a consistent weld bead.
Check the drive rollers in your welder. Make sure they are the correct size for your wire and are free of debris. Also, look down the gun liner occasionally. If it feels stiff or if the wire isn’t moving freely, it might need cleaning or replacement. A smooth wire feed is foundational.
Clean Gas Flow
Your shielding gas needs to flow properly. If the gas flow is too low, you’ll get contamination. Too high, and you can disrupt the arc or create turbulence. You want a steady, even blanket of gas protecting your weld.
You can check your gas flow rate with a flow meter, usually found on your regulator. A common starting point is around 20-25 cubic feet per hour (CFH) for steel. You should also listen to the gas hiss from the nozzle before and during welding. It should be a steady sound, not a sputtering or weak flow. You can also perform a simple test by holding the gun close to your hand (but not too close!) and pulling the trigger. You should feel a gentle, consistent stream of gas.
Proper Weld Bead Appearance
After you’ve welded a short bead, take a look at it. What does it tell you? A good weld bead should be smooth, with consistent ripples. It should have good “wetting” – meaning the weld metal has flowed and blended nicely with the base metal.
Signs of trouble include:
- Sputtering: This often means incorrect voltage or amperage settings, or an issue with gas flow.
- Porosity: These are little holes or bubbles in the weld. It’s usually caused by contamination or poor gas shielding.
- Undercut: This is a groove or channel melted into the base metal next to the weld. It weakens the joint.
- Rough or Irregular Bead: This can indicate inconsistent travel speed or arc length.
A good weld bead is a visual confirmation that your settings and technique are dialed in. Many experienced welders can diagnose issues just by looking at the bead. Learning to read your welds is a valuable skill.
Key Components and What to Inspect
When you’re diving into MIG welding, understanding the main parts of your setup will help you troubleshoot and maintain it. These are the bits and pieces that make the whole system work.
The MIG Gun
This is the part you hold. It has the trigger, the nozzle, the contact tip (where the wire exits), and the liner inside. Keep the contact tip clean and free of spatter. Spatter can build up and impede wire feed or cause poor electrical contact. Replace the tip when it starts to look worn or deformed. Regularly check the gun liner for any damage or kinks. A damaged liner can cause inconsistent wire feed.
The Ground Clamp
This clamp needs to make a solid connection to your workpiece or welding table. A poor ground connection is a very common cause of welding problems. It leads to unstable arcs and weak welds. Make sure the clamp jaws are clean and free of rust or paint. Ensure it’s clamped tightly to a clean spot on the metal.
The Wire Spool Holder
This is where your spool of welding wire sits. Ensure the spool is mounted securely and can rotate freely. If the spool is wobbly or restricted, it can cause feeding issues. Also, check that the spool cover or tension arm isn’t too tight, preventing the wire from unwinding smoothly.
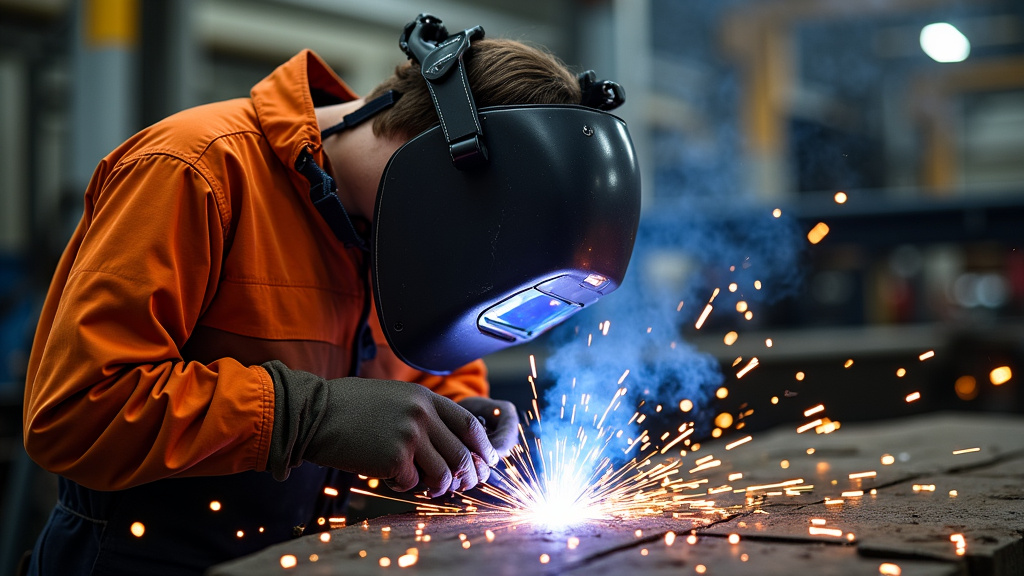
Troubleshooting Common MIG Welding Issues
Even with the best setup, you might run into a few snags. Don’t get discouraged! Most MIG welding problems have fairly simple solutions.
Sputtering and Uneven Arc
If your arc sounds like bacon frying constantly, it’s not a good sign. This sputtering can be caused by several things:
- Incorrect Voltage/Amperage: The settings might be too high or too low for the material thickness. Consult your welder’s manual for recommended settings.
- Poor Ground: As mentioned, a loose or dirty ground clamp is a frequent culprit.
- Dirty Contact Tip: Clean or replace the contact tip.
- Wire Feed Issues: Check for kinks, worn drive rollers, or a damaged liner.
- Gas Flow Problems: Ensure your gas is on and flowing at the correct rate.
Think of troubleshooting like detective work. You gather clues (what the weld looks like, how it sounds) and eliminate possibilities. Your goal is to find that smooth, consistent arc.
Weld Puddles Not Melting Properly
If your weld puddle seems small, not flowing well, or not penetrating the metal, you might not be getting enough heat. This typically points to:
- Low Amperage/Voltage: You need more power for thicker metals.
- Incorrect Wire Speed: If the wire speed is too high for the voltage, it can cool the arc.
- Dirty Metal: Rust, paint, oil, or dirt on the metal prevents a good fusion. Always clean your metal thoroughly before welding.
Remember, you want to melt the base metal, not just lay a bead on top. Penetration is key to a strong weld. You can sometimes test your penetration by welding two pieces together and then trying to break them apart. A good weld will resist breaking easily.
Quick Checklist for Your MIG Welder Setup
Before you start welding, or if you’re experiencing issues, run through this quick checklist:
- Is your ground clamp securely attached to clean metal?
- Is the correct size drive roller installed for your wire?
- Is your contact tip clean and free of spatter?
- Is your shielding gas turned on and set to the correct flow rate?
- Are your welder settings appropriate for the metal thickness you are welding?
- Does the wire feed smoothly without snagging?
Going through these checks can often pinpoint and solve a wide range of welding problems quickly. It’s about being prepared and observant.
Conclusion
You now have a solid understanding of what a MIG welder is and how it works. We’ve covered the essentials like the wire electrode, shielding gas, and gun control. More importantly, you know the key signs of a well-functioning setup: a stable wire feed, clean gas flow, and a proper weld bead appearance. Keep these checkpoints in mind for consistent, strong welds. Your next step is to practice what you’ve learned. Get hands-on with your MIG welder and focus on achieving that smooth, controlled arc. You’ve got this!
Frequently Asked Questions
What’s the main difference between MIG welding and other welding types?
The biggest difference is MIG welding uses a continuously feeding wire electrode and a shielding gas. This makes it generally easier to learn and control for many projects. Other types, like Stick or TIG welding, use different consumables and techniques, often requiring more practice to master.
How often should I clean or replace my MIG gun’s contact tip?
You should clean your contact tip regularly, ideally after each welding session, by removing spatter. Replace it when it looks deformed or worn down. A dirty or damaged tip can cause inconsistent wire feeding and electrical connection issues, leading to poor welds.
Can I use a MIG welder on aluminum?
Yes, you can MIG weld aluminum, but it requires specific considerations. You’ll typically need a spool gun or a U-groove drive roller for soft aluminum wire and pure argon for shielding gas. Aluminum also requires careful cleaning before welding.
What causes porosity in my MIG welds, and how can I fix it?
Porosity, or small holes in your weld, is usually caused by contamination or poor gas shielding. Ensure your metal is clean and free of rust, oil, or paint. Check that your shielding gas flow is at the correct rate and that there isn’t excessive wind blowing the gas away from the weld area.
My MIG welder keeps jamming the wire. What could be wrong?
Wire jamming is often caused by a kink in the wire, a dirty or damaged liner in your gun, worn drive rollers, or a spool that isn’t mounted securely. Inspect your wire spool for damage, check the gun liner for obstructions, and ensure the drive rollers are clean and properly seated for your wire size.